Wednesday, March 9, 2016

Happy Mother's Day necklace, earrings & more!


It’s springy, it’s girly, it’s the new Mother’s Day collection of jewelry making beads and findings! The first word out of my mouth when I received the pieces below was “awww!”
  

I just LOVE the flower pendants. They’re really special and worth seeking out if you have a nearby Walmart

In fact, I’m going to be grabbing a few more of these pendants for myself and using them to embellish other things, like a new cell phone case, but that’s a story for another day! :)
After deciding which one to use on a necklace, I wondered what I could do with the FABULOUSLY 3-D white flower pendant.  I went immediately to “craft project!”
  
In fact, once I decided I could make a necklace for this cute journal I found at Walmart for $5.99, I decided it needed one more little touch, so I cut the “Mother’s Day” words off of the Cousin bead package and glued them to the front of the journal. Ha! A simple touch that just felt right. Crafters, you know what I mean, right?! 

So, back to the necklace and earrings. The design for the necklace is a bit of a go-to for me. Using the beads in this way you get a little bit of both worlds. You get interest and dangles in the front and simplified stringing so you can see the beauty of the silky looking pearls in the back!

The earrings just created themselves. The little enamel flowers were just crying out to be dangling from someone’s ears, don’t you think? Very sweet!

In case you’re interested in making these things or just looking for a little bit of inspiration to get started on your own project, instructions are below. To all the moms out there…Happy Mother’s Day!


Materials:
#AJM31112187 –  Pink pearl beads
#AJM31112195 –  Accent flower pendant & flower dangles
#AJM31112213 –  Accent multiple flower pendant
#34774090 – Jewelry Basics 96pc Metal Gold Starter Pack
#3202101 - 40'.45M 7 - Strand Bead Wire Gold

Tools Needed:
·         Round nose plier
·         Flat nose plier
·         Wire cutters

Techniques Used: (Include any stitch or sewing techniques)
·         Make a loop
·         jump rings
·         Crimp


 Instructions

Create four 1-bead 6mm pink pearl headpin dangles
1.     Add one pearl bead to a headpin, bend remaining wire at the top of bead to a 90 degree angle. Leave approx. 3/8” of wire above the bead and cut the rest off.
2.     Use round nose pliers to make a loop.
3.     Repeat 3 more times.

Create four 1-bead 8mm pink pearl headpin dangles
1.     Add one pearl bead to a headpin, bend remaining wire at the top of bead to a 90 degree angle. Leave approx. 3/8” of wire above the bead and cut the rest off.
2.     Use round nose pliers to make a loop.
3.     Repeat 3 more times.

Create six 1-bead 6mm pink pearl eyepin connectors as follows:
1.     Add one pearl bead to an eyepin, bend remaining wire at the top of bead to a 90 degree angle. Leave approx. 3/8” of wire above the bead and cut the rest off.
2.     Use round nose pliers to make a loop.
3.     Repeat 5 more times.

Create four 1-bead 8mm pink pearl eyepin connectors as follows:
1.     Add one pearl bead to an eyepin, bend remaining wire at the top of bead to a 90 degree angle. Leave approx. 3/8” of wire above the bead and cut the rest off.
2.     Use round nose pliers to make a loop.
3.     Repeat 5 more times.

Create two bead wire strands with nine 8mm & ten 6mm pearls
1.     Cut approximately 6” of beading wire.
2.     Slide the end of beading wire through a toggle clasp loop and bend gently at about ½”.
3.     Add a crimp bead and slide it up to cover the short and long ends of wire.
4.     Use crimping tool or smash crimp with flat nose pliers to secure wire.
5.     Add 19 pearl beads in a pattern: 6mm, 8mm, 6mm, 8mm, etc.
6.     Add a crimp bead to end of beading wire.
7.     Slide beading wire through the eyepin loop of a 6mm pearl bead eyepin connector and weave end back through crimp bead.
8.     Pull short end of wire until beads are tight on the wire.
9.     Use crimping tool or smash crimp with flat nose pliers to secure wire.
10.  Trim excess wire using flush cutter.
11.  Repeat bead strand for other side of necklace.

Assemble necklace
1.     Create five-bead connector strand (6mm, 8mm, 6mm, 8mm, 6mm)
2.     Beginning with one side of necklace, connect 6mm pearl bead eyepin connector to an 8mm eyepin connector opening/closing 4mm jump ring.
3.     Repeat by adding remaining 4 eyepin connectors with jump rings.
Repeat on other side of necklace
1.     On the middle jump ring between the two 6mm pearl bead eyepin connectors, add the multi-flower pendant by opening and closing jump ring attached to pendant.

Add dangles
1.     Add a 1-bead eyepin dangle to each jump ring connector. Add 6mm dangle to the jump ring on either side of the flower pendant.
2.     Add 8mm dangles on next jump ring, then 6mm, etc. See project photo.

Earrings
1.     Create one eyepin section for each earring by adding 6mm, 8mm, 6mm pearl beads to eyepin, bend remaining wire at the top of bead to a 90 degree angle. Leave approx. 3/8” of wire above the bead and cut the rest off.
2.     Use round nose pliers to make a loop.
3.     Add ear wire to one eyepin loop.
4.     On the other end, connect tiny flower charm using 6mm jump ring.
5.     Repeat for other earring.

Mother’s Day Journal Materials
·         Journal
·         #AJM31112216 –  gold tone necklace
·         #AJM31112195 –  Accent flower pendant & flower dangles
·         Packing Tape
·         Decorative paper
·         Glue

Tools
Hole punch
Flat nose plier

Instructions
1.     Find an inexpensive journal with a fairly thin “hard-bound” cover.
2.     Use hole punch to make holes for necklace wire.
3.     Remove clasp from each end so the necklace ends fit through hole punch. Slide necklace ends through holes.
4.     Using packing tape, tape down the necklace strands on the inside cover. Cut out a piece of decorative paper and glue over the taped section.
5.     Open jump ring to add large while enamel flower to chain.
6.     Cut “Mother’s Day” words from the bead package and use craft glue or glue stick to adhere it to the journal cover.

ENJOY! 

Tuesday, March 1, 2016

Surprisingly fuzzy beads!


Just in case you were looking for a reason to take a detour into the jewelry making aisle at Walmart, here you go!! I did just that over the weekend and was SO SURPRISED to find these beads.

They were like a little ray of sunshine drawing me to them! The closer I got to them, the happier I felt. And then...I touched them! They're soft and fuzzy...a serious "awww" moment!

I just don't know how I'd never seen these before. I mean, I've been to the Cousin Corporation and I watch their website for new products. However, I haven't been bead shopping in real life since the holidays. I guess that's where I went wrong.

So, getting back to beads...The other item I ended up buying was memory wire. It's going to be like a little match made in heaven. I  am going to need a VERY cool dangle for this multi-colored, multi-strand memory wire bracelet.

I wish it was ready for me to wear tomorrow..hmmm...I'll keep you posted! :)

Gotta go dig for those neon pink tassels...I know I have one somewhere!

Monday, February 8, 2016

Just add sparkle!


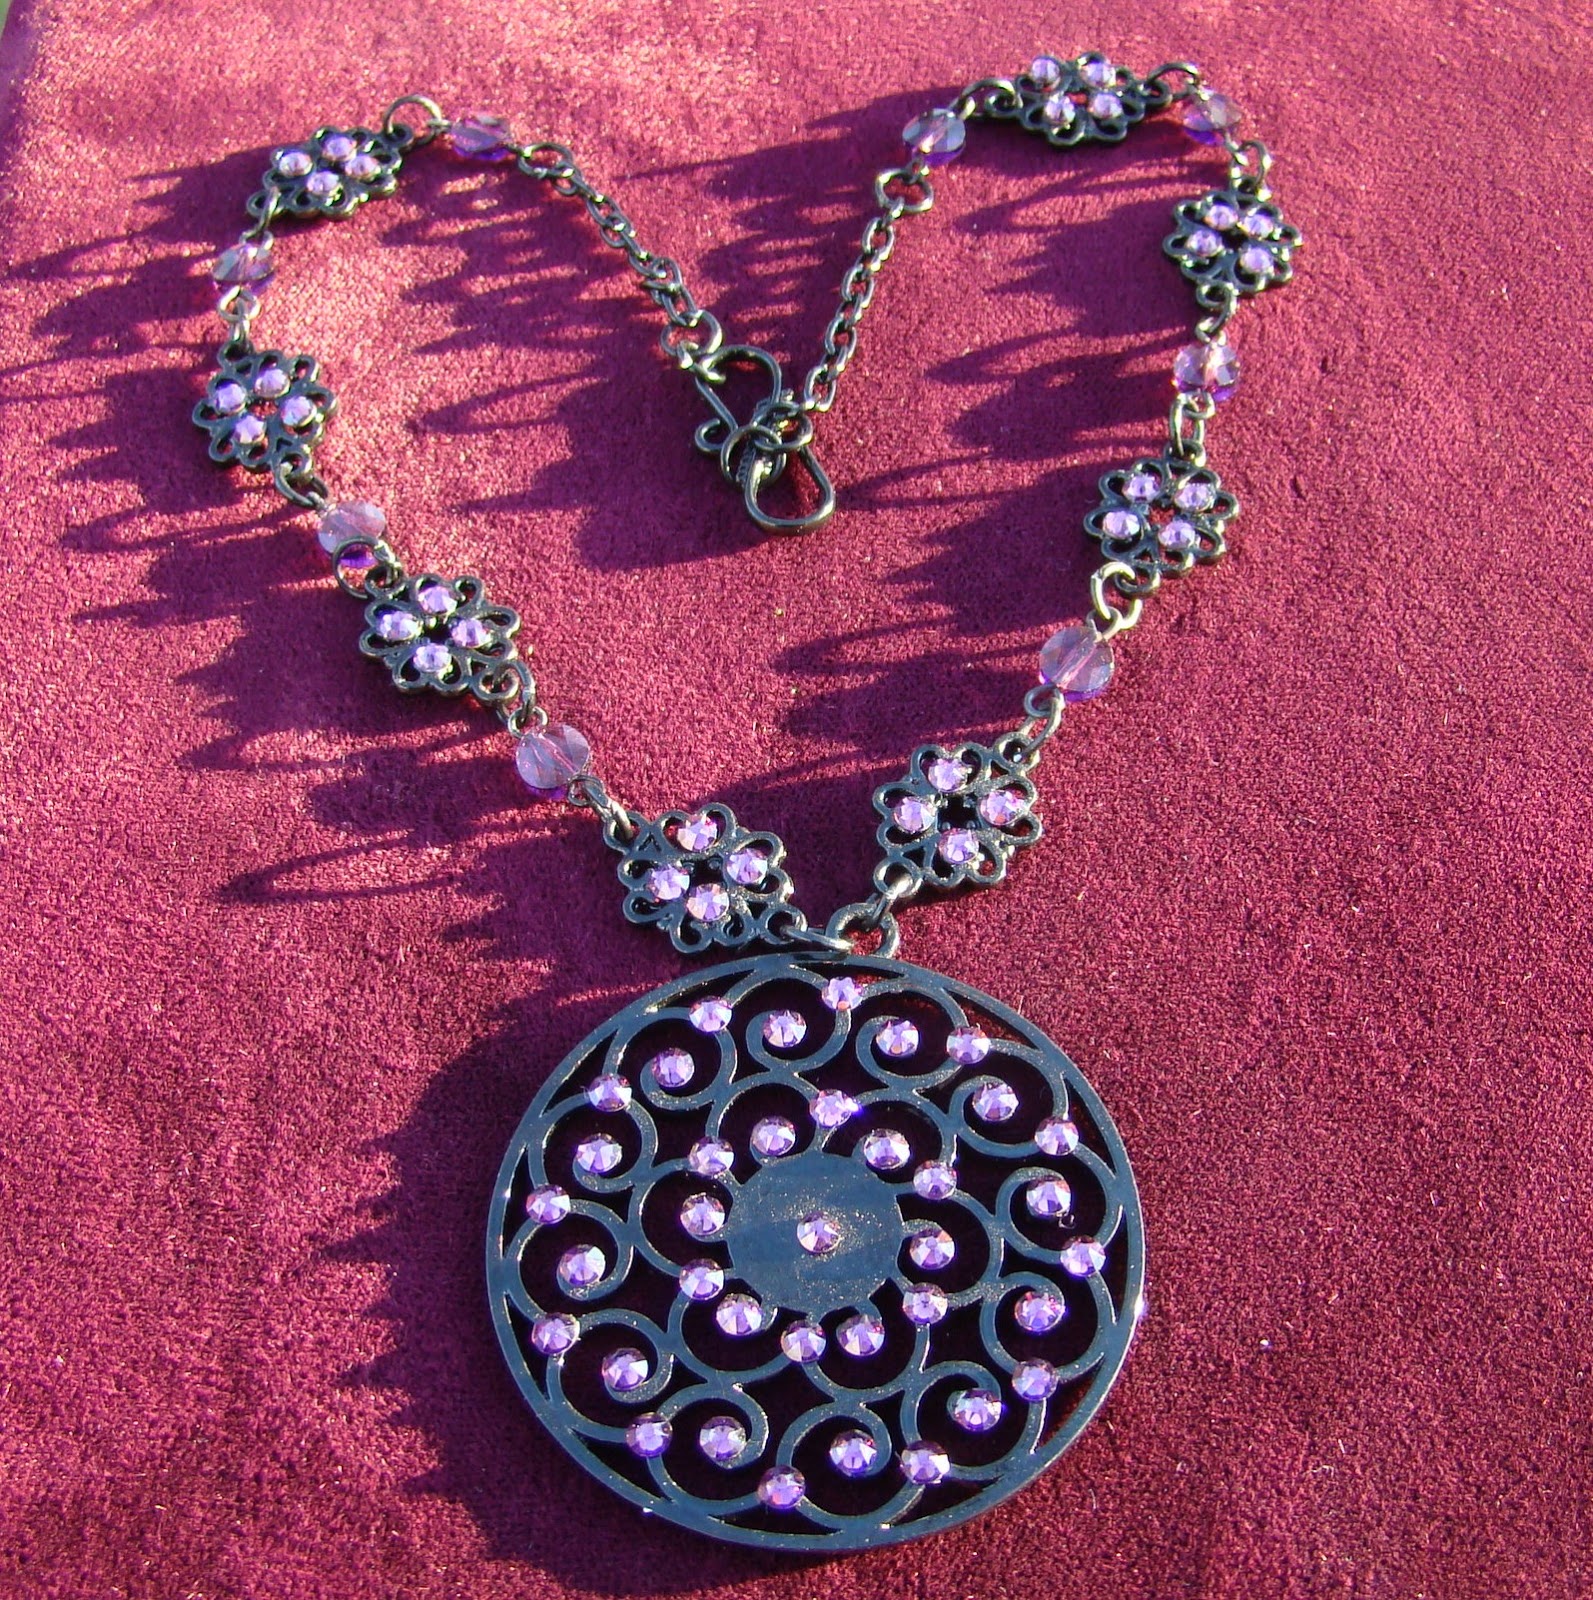
Sometimes when looking at jewelry pieces like the pendant and scroll connectors below, I see them with added sparkle. It's an automatic response in my head. It occurred to me yesterday that I don't always consider it as receiving inspiration, I just take it for granted.

So, today I'm sharing gratitude not only for receiving inspiration, but also for having all the supplies needed to make what I saw in my head, YAY! This Cousin pendant and connectors were practically made for each other and I was so glad to find them in my bead stash! Not to mention the Swarovski flat backs and 6mm mini rounds in amethyst.


I was a little nervous about gluing on the flatbacks since most of my flatback experience has been with hotfix flatbacks. 
I set up my little work area starting with the supplies below: pendant still attached to package, Beacon Gem-Tac glue, glue holder (cap from my bottle of water), headpin for applying the glue, tweezers and fabulously sparkly Swarovski flatbacks! As I mentioned in my last post, this craft glue is perfect for projects like this and does not have a strong chemical smell at all which is a total bonus! 

It went so fast and the headpin was the perfect size to dot glue for these tiny little flatbacks. It was a breeze. I finished all the gluing and set everything aside for a couple days before connecting all the pieces...so easy!

If you've been wanting to try a project like this, I encourage you to just do it! I was proud of myself when it was finished. Happy that I didn't let my fear and inexperience get in the way!

After I finished this project, I started gluing flatbacks on lots of things, including winter gloves as mentioned in my last post.

I'd love to see your flatback projects too. Just leave a link in the comments. :) 


Monday, February 1, 2016

It's a new year AND a sparkly new day!


There's something about a fresh new year that makes me want to take a leap forward and leave old ideas, things and habits behind. Unfortunately, it's also at a time when it's necessary to wear lots of clothing layers including coats, hats, gloves, scarves, boots, etc. Seems to create a bit of a conflict doesn't it?

What to do, what to do?

In hindsight, I see now why I was so intent on making these sparkly gloves when the weather turned cold! I made them for myself, for friends and for family members. Not only that, I took this craft to our annual December craftnight! EVERYONE made fun, sparkly gloves!!

I really have to laugh! It's so transparent now, but I didn't realize it at the time.

I NEEDED SPARKLE! When I get pushed out of my happy place, I look around for sparkle and if I don't find any, I CREATE IT! Wow...this realization will take me a while to process.

So, more about the gloves! I bought quite a few pairs of these smart phone gloves at Walmart for $2 a pair, a great deal! I also found this bag of sequins at Walmart for a few dollars. An amazingly stuffed little bag of sequins.

Make sure to have a ziploc baggie handy because you'll never get them all back in the bag once it's open. It contains hearts, flowers, leaves, stars, butterflies and more...well worth the $3!

Rather than sew the sequins on, I thought I'd try Beacon Gem Tac since I had received it from the Cousin Corporation to try out. I have a bit of a sensitivity to strong chemicals and do my best to avoid them. I was a little concerned until I opened the glue and it was as strong as school glue! How could it possibly adhere well if it doesn't smell terrible?

I have no idea, but it does! I'll share more jewelry projects using Gem Tac in future posts, but wanted to mention the sequins are glued on the gloves. The pink gloves also have Crystazzi flat back crystals glued on and the gray gloves have tiny little Swarovski crystals glued on. SO SPARKLY!!

If you have a get-rid-of-winter-blues sparkle project to share, please leave a link in the comments section. :)

Thursday, November 26, 2015

Happy Magical Thanksgiving!


I couldn't help sharing this cornucopia bracelet from several years ago. AND, I just received the holiday bitmojis on my phone so it only made sense that I share both!

This bracelet reminded me that now is the perfect time to make literal jewelry pieces to represent the sights and traditions of the holiday season.

The top drilled briolettes in the cornucopia bracelet made me wish I had a bunch of green ones to make a wreath bracelet! Briolettes add a MAGICAL component to any stringing project. You just string them up one after the other and like magic they twist and turn next to each other. The finished product looks so complex as if you must have done some sort of complicated weave.

I just did a search for top drilled beads similar to those used in the cornucopia. It resulted in lots of Swarovski and some unexpected items too. Now my head is spinning with ideas!!!

Here are some that piqued my interest...


These blue and silver beads are so sparkly! I would love to see them strung up alone or together. The blue and white or silver and white would also be striking!
These little green rivolis would make a great wreath bracelet with the red briolettes hanging from it as the bow.

Okay clock...I see you ticking away! I guess it's time to close the laptop and get busy. Happy holidays!!

Sunday, November 15, 2015

Time for holiday jewelry making?

Wow, I'm not sure how it got to be the middle of November already, especially when I'm still trying to wear flip flops and boycotting closed toe shoes...

But, here we are and it's time to get busy!

While gathering up beads to play with for inspiration, it occurred to me I should also do a quick search on A Bead A Day for project ideas.

Is it wrong for me to say how much I love something I made? I promise you it's not from an egotistical place, it's from a place of awe that I received the inspiration for something more unique than I would normally make.

I LOVE it when the beads tell me what to do and this is a classic example of that. I have made plenty of right angle weave designs, but none that had so many dangles and charms hanging from it.

When it was finished, I remember wondering how it happened. It was similar to redecorating a room. You go from store to store looking for little things that represent you and the style you're going for. When you put it all together, you wonder how it was possible it all worked so well together.

I think it's magic...but that's probably because I don't know the technical term for it. Any idea?

Happy holiday jewelry making! If you're interested in instructions for this one, put your email address in the comments and I'll send them to you. OR, email me. :)


Monday, August 24, 2015

Stunning Swarovski - Quick & Easy Design

It's true that I LOVE a quick and easy jewelry project. Especially one that either looks more complex than it actually is or has a real sparkly kick.This necklace falls in the sparkly kick category!

As I mentioned in the last post, I received 10 of these fabulous Swarovski 25x7mm Crystal Bermuda Blue Queen Baguette Pendants.When I sat down on a Saturday to design something, I found myself in a bit of a hurry so I could go out and run all my weekend errands. 

The rhinestone chain is almost always on my beading table, but the silver connector is something I picked up at Cousin headquarters in Florida that I had never used before. 

Honestly, this necklace pretty much created itself. The impact of these crystals all lined up in real life is truly stunning, I had feelings of unworthiness about wearing it at first, but got over that pretty quick! ;)

So, when I was trying to come up with a way to describe this swarovski stunner, I checked the thesaurus for words related to spectacular. Here's what came up. What do YOU think? 

1.      amazing 
2.      astonishing 
3.      astounding 
4.      breathtaking 
5.      daring 
6.      dazzling 
7.      dramatic 
8.      eye-catching 
9.      fabulous 
11.  grand 
25.  marked