Friday, May 5, 2017

Super Friends jewelry, yay!


My favorite memory of the Super Friends cartoon is Wonder Woman flying around in her invisible plane. She was a force to be reckoned with!

Happily, Wonder Woman is part of the new collection by Cousin D.I.Y. in partnership with DC Comics!

If you've never seen an episode of Super Friends, it's worth checking out. Just head to YouTube and I'm sorry in advance for causing a binge-watch.

Now back to the jewelry pieces. Hello LOCKETS!! Is there any "little girl" who doesn't love a locket?

There's something magical about what might be hidden inside. Add a Super Friends theme and it's a serious win-win in my book!

If you have a chance to visit your local craft store, you may be able to find these at JoAnn's, Hobby Lobby or Michael's. 

You'll find Superman, Batman and the Flash too! LOVE these comic book graphics! They're pretty special.

The spinners are two sided. On one side the comic book cover art and on the other side, you'll find the familiar character logo.

So awesome! I'm grateful heroes from my childhood continue to capture hearts and make new memories in 2017!

I'd love to hear what you picked up and what you're going to make. That's the next step in this comic adventure...what am I going to make?

At least one of the lockets is going on a simple long chain. I will probably add a tassel or two to the chain links leading down to the locket and of course a few dangly crystals.

Now, what to put on the inside? A photo or some tiny flatback crystals...mmm. Okay, now that I'm all excited about making jewelry it's time to get ready for work. Oh well, gotta support the habit!! :)

Have a great weekend!

Friday, March 31, 2017

It's a jewelry design BLOG HOP!


I do so love a blog hop! As mentioned in my last post, the six Cousin DIY ambassadors received a package containing identical beads just for the fun of seeing everyone's unique design styles. You never know what might happen during the creative process. So fun!

In the bracelet above, I used memory wire to connect to the focal bead since it's pretty lightweight and the beads are a bit heavier. The memory wire helps maintain the structure.

Of course, I think the dangles bring it to life! I've never had a bracelet like this before with faux druzy pieces so I'm excited to wear it. Those druzys are pretty spectacular. :)

This simple silver necklace may end up being my favorite go-to piece for a while.


It's surprisingly striking and would look great at the beach with a bathing suit or on a flowing bright colored blouse. The bright silver spikes make a real statement.

And, speaking of spikes... The necklace below totally makes me laugh. I don't always create jewelry for the humor in it, but it happens.

This one is perfect for a button-up blouse. The focal piece will be nicely framed and when you get a glimpse of the silver and aqua it might even cause a double-take. I think it's the contrast.

Originally I thought there was a fifties vibe with the black and light aqua, but then it took on a life of it's own. I just loaded up long eye pins with the aqua beads to give it structure and added a giant lobster clasp.


Can you tell I'm chuckling? I don't know why, but it really makes me laugh. Haha! :) It's beachy, but something about the black shamballa beads gives it a little extra dose of fun. What do you think?

Thanks for following along on our little experiment. Each ambassador will be posting their results in the very near future too. Their links are below. Have a great weekend!!

Dawn Doucette - Bella Amore
Rebecca Grafton - My Girlish Whims
Shelly Owen - Raziela Designs
Rachel Nielson - Adventures of a DIY Mom
Jennifer Priest - Hydrangea Hippo

Saturday, March 4, 2017

Design challenge! Preparing for a blog hop

Beads have arrived...it's time to design! 

All six Cousin DIY ambassadors have received the same beads and we're anxious to see what everyone creates.

I learned early in my jewelry making journey that EVERYONE sees things from a unique perspective. I had a very sheltered view of creativity in my youth. I didn't have a clue about individuality and the excitement of being different. 

The easiest way to fit in with other people was to be like them. There weren't any classes in the old days in mainstream rural Ohio schools about self expression. I remember getting a D in art, my very first D...in art? Wouldn't you think you'd at least get a C just for showing up?
              

Fortunately, time passed, life experiences happened and I found myself involved in a creative outlet...making jewelry! 

Many blog hops later, I'm excited to create something fun and unique!

I'm not sure if you can see them clearly, but there's a strand in the photo above with some substantial spikes! I can't wait!! :) 

We'll all be sharing our designs at the end of the month...stay tuned! 

Wednesday, February 1, 2017

For the love of beautifully photographed jewelry


Okay, I admit I was already sort of in love with this blue dangly bracelet BEFORE the photograph, but after...it's a mixture of love and awe. Thank you Brian Chan and Crystal Cousin!

During my visit to Cousin Corporation in Florida last year, I had the good fortune to receive a photography lesson by top photogs Brian and Crystal.

The best part of the story is this...we forgot to bring a piece of jewelry outside to actually photograph. So, guess who offered to pull a bracelet off their wrist? Ha!

They explained how anyone could take great bead and jewelry pics using their simple methods. It's all about the lighting and background!


First, the background...Brian went across the parking lot and picked up a large handful of white rocks.

Sidenote here, the unplanned perfection of the white rocks and the bright blue beads was not lost on me! I mean...perfection!

Now the lighting...filtering the light using a homemade filter - insider secret...fabric attached to a PVC pipe frame.

And the final step, photoshop! :)

I have to say, the photo was pretty perfect without any adjustment at all! Am I biased because of the bead-love?

What a great experience, thanks you two for a great lesson and for taking the time out from your busy schedules to hang out with a group of bead-lovers. I'm a huge fan!

For any of you who see photos in the Cousin Corporation or Prima Bead catalogs and website, it's all done by Brian and Crystal. Amazing!

Now, let me get that bracelet down off its pedestal so I can wear it today. :) 

Wednesday, November 16, 2016

The ultimate contrast: Swarovski crystals & pipe cleaners


OMG, I am totally loving this awesome contrast!  

When I bought a huge bag of these colorful pipe cleaners at Hobby Lobby, officially called "Spiral Chenille Stems" I figured I would just play around with them until the novelty of the bright colors and the quirky spiral wore off.

Sometimes I just like to play with good old fashioned craft supplies for their stress relieving properties. 

It just so happened I had these amazing Swarovski spikes laying out on my table too. I got curious about what the stems might look like with beads strung on and twisted around as a focal piece. 

To be perfectly honest, it was a week night and I was too tired to dig and sort through all my beads so I just opened the package at hand. Haha, who knew...laziness paid off!!

Once I added the clasp to the pink bracelet and had it on my wrist I discovered I needed to try another combo. Now I have one for each wrist.

Actually each of these combinations work for different reasons. The pink bracelet with the giant spikes feels a little rebellious. The purple chenille stem bracelet with the smaller Swarovski spikes is more surprising and fun than rebellious.

Yes, for some reason I seem to get an emotional response from jewelry. Need an extra helping of confidence, put on a strong piece of jewelry. Too much seriousness in my life, grab something colorful and youthful. 

Cheap therapy, right?

Glad I had a chance to share! I would love to hear your ideas for other quick and easy ways to use these chenille stems in jewelry making. :) 

Wednesday, August 31, 2016

Clip-on Swarovski Charms!

OMG...it's a great day! I am loving these charms made with Swarovski crystals!!


When I heard Cousin DIY was sending its ambassadors some new Swarovski charms, I never expected them to be so cool and so substantial! 

As you can see, these all have a major WOW factor! Each of the ambassadors received five charms. Here are the ones I received. So fab and just perfect for me! I haven't seen the entire collection, but they are available exclusively at Michael's stores.

I wanted to make a jewelry project with one of them, but I also had a couple ideas about clipping charms onto other things in my little world. 

Because I was so fascinated by the Buddha charm which is even better in real life than in this picture, I knew I wanted to use it for something special. The charm itself is SO sparkly and magical on its own.

I use this old Clinique apple-shaped case to hold the mala I use for repeating my mantra. It used to have a little green leaf zipper pull, but I took that off and added the Buddha. And now it is perfect! 


I felt pretty special to have received my own birthstone charm for September which came with an adorable tiny little tag with the name of the month on one side and a little crystal on the other.

I thought it would add some much needed sparkle to my cell phone case, but actually the MARCH birthstone charm looked even better! That's my Dad's birthstone and since he passed away unexpectedly last month, I was pleased I received it and happy to find such a great place for it.


AND, last but not least, a jewelry project, yay! I was shocked that I just happened to have aqua and dark blue Crystazzi mirror beads on hand..haha! They look like they were made to go with the charm below! I love it when things come together so perfectly.

The evil eye charm is sooo amazing. Hopefully the opaly-ness and the heft of this charm come across in the picture.


The evil eye charm is meant to ward off or deflect evil away from yourself. I wore this yesterday and I felt quite protected, even if slightly distracted by the beauty of the sparkle. :)

Here are a few step by step photos: Get a bunch of eyepins together, add a bead, bend the eyepin to a 90 degree angle, use cutters to trim off the excess, leaving just enough wire for making a loop. Just before finishing off the loop with round nose pliers, add the next eyepin, then tighten down the loop. Just repeat that until you have the right amount of beads for the size of your wrist, then use open jump rings to add a toggle clasp and clip the evil eye charm to one of the jump rings using the lobster clasp on the charm. It's THAT easy! 


I hope you have enjoyed seeing these charms as much as I have. See you at Michael's! :)

Monday, June 20, 2016

Giving the gift of Buddha


What better to give a life coach than a sparkly, tasselly Buddha charm bracelet!?

This isn't what I originally planned to make when I sat down to bead.

I was going to make a version of the acrylic spikey bracelet from the last post.

However, all the tassels and the Buddha head charms were sitting on the beading table and I kept picking them up.

Before I knew it I was creating something completely different!

Love it when that happens and if I haven't said it recently, I LOVE MEMORY WIRE!

You don't have to worry about sizing a bracelet when using memory wire and that takes a lot of worry out of the process.

As much as I love memory wire, I ALSO love eliminating worry from my life! :)

Tuesday, June 14, 2016

Fun with acrylic spikes!


You wouldn't think a spikey bracelet could also be pretty and sweet. 

I have to say I love that it's pretty much a contradiction of itself. These light amythest spikes from Walmart paired with a few glass pearls provided a simple way to feed my rebel spirit!

More often than not it seems that the beads are telling me what to do (if I let them).

When I pulled out the package of spikes, I wanted to create something a little more complex and was considering a right angle weave with faceted beads.

Thankfully, I followed my instincts of just keeping it simple.

These spikes have their own built in wow factor and didn't need any complicated pattern for added flair.

I'd love to see how you've used spikes in your projects. If you want to share, just leave a comment and include a link back to your blog or website. 

Monday, June 6, 2016

Summertime fun: Macrame & Swarovski Crystals!

Wondering how to use leftover kumihimo cord? How about a little macrame?

This necklace pretty much designed itself. I knew I wanted to hang Swarovski dangles from it, but had no idea it would end up being frayed until the moment I was unraveling the ends. :)

It's always fun when you end up surprising yourself when making jewelry. This necklace was one of a handful I made for the Cousin Corporation to show off Swarovski crystals at the beginning of the year.

It's definitely my fave. The three long strands that dangle down the back make this the perfect beach necklace to wear with tank tops or bathing suits for a little extra flair.

Now I'm wishing I had some bright colored cord for a completely different look!

Leave a comment or email me if you'd like the instructions.

Have a great summer!

Monday, May 23, 2016

Asked for tassels, found tassels!

Don't you just love it when a plan comes together? I was itching to make some tassels recently so I started digging through beads and findings. I quickly realized my beads were in such disarray, it was necessary to take a detour and spend some time getting organized.

I completely ditched all the beads in 10 bead containers into serious bead soup in order to make room for fresh new supplies. I figured if I hadn't opened a bead case in over a year, it was time.

After getting through several giant ziploc bags full of beads and getting them all sorted into nice little compartments, it was time to call it a day. As I was putting everything away, I discovered these jewelry making kits I received on my recent trip to Cousin Corporation headquarters.

Yay! Organization paid off!

As you can see, I've already ripped open the packages to discover the raw supplies necessary to make some simple tassels. That's a great place to start!

For now, though, I'm off to get ready for work. Not sure why inspiration to bead comes in the early morning hours when there is no time, but that's how it works.

I'll check back in soon and let you know how it goes! Have a great day!

Monday, May 9, 2016

Feeling the need to make some tassels


The thought never crossed my mind until I received these tassels in my last Cousin Corp. package. They are SO cool! Several inches long and the colors are perfectly Floridian.

As soon as I saw them all I could think of was craft project.

I went on the website to see if there were other interesting tassels and I found this one, which is also in the new Boho line.


Okay, now the craft store is calling. I could go through all my jewelry-making and craft supplies and find some pretty fabulous materials to use in a tassel, but there's nothing like heading to the craft store when inspiration calls!

If you have experience making tassels, please share. I'd love to know where your inspiration came from and how you brought your ideas to fruition.

I'll keep you posted on how things go on this end. :)

Thursday, May 5, 2016

Swarovski crystals in the mail...it's a great day!


It's so awesome to get a package in the mail, especially when you know there's something special and sparkly inside!

When I talked to my husband while walking to the parking garage after work yesterday he gave me the news. You got a package!!

Yay! I knew there were crystals inside and I knew they were crystals I haven't seen in real life before. I prefer shopping for beads in person rather than online, but unless you get to a bead store, there aren't many opportunities to check out all the different shapes and sizes of Swarovski crystals.

I haven't even opened these packages yet, but I wanted to share to get your input. These are 8mm triangle pendants in crystal AB and bermuda blue! Each package has 6 pieces and I am the proud owner of three packages of each color.

Tonight I will open and touch them...something to look forward to!

If you have experience using these, let me know I'm in the mental design phase right now.

As always I'm seeing them all dangling in a big clump of sparkliness. :)

Tuesday, May 3, 2016

Fun in the sun - mixing & mingling!


Mixing and mingling with beads that is!

I had a chance to get a few pics of some faves from my Cousin Corp. 10-minute bead grab today.

The sun started to shine and it was like magic!

The added sparkle gave me all kinds of inspiration. I realized then that I hadn't brought any tools with me for the photo op.


Probably a good thing, I might never have made it back from lunch. :)

It was pretty easy to see some great match-ups so I tore them off the packages to get a better look.

Love the butterflies, love the sparkle and even love the black faux leather bracelet!

Let me know what you think. :)

Monday, May 2, 2016

DIY Jewelry-making kits


Pictured here are just a handful of the DIY jewelry-making kits the Cousin Ambassadors learned about during our recent trip to Cousin Corporation Headquarters in Largo, Florida.

We were privileged to meet and have a brainstorming session with the person on staff whose primary role is to develop ideas, create samples and pitch jewelry-making kits to craft stores. HOW FUN!

While it sounds like the best job ever, it would really take a lot of focus to stay on track and keep moving forward. We not only saw the huge wall of existing products, we also saw the wall of kits that didn't make it to the stores.

As with any industry, finding the key to what moves customers at any given time is the magic bullet.

These are the kits that moved ME in that moment and found their way into my return luggage. :)


Saturday, April 23, 2016

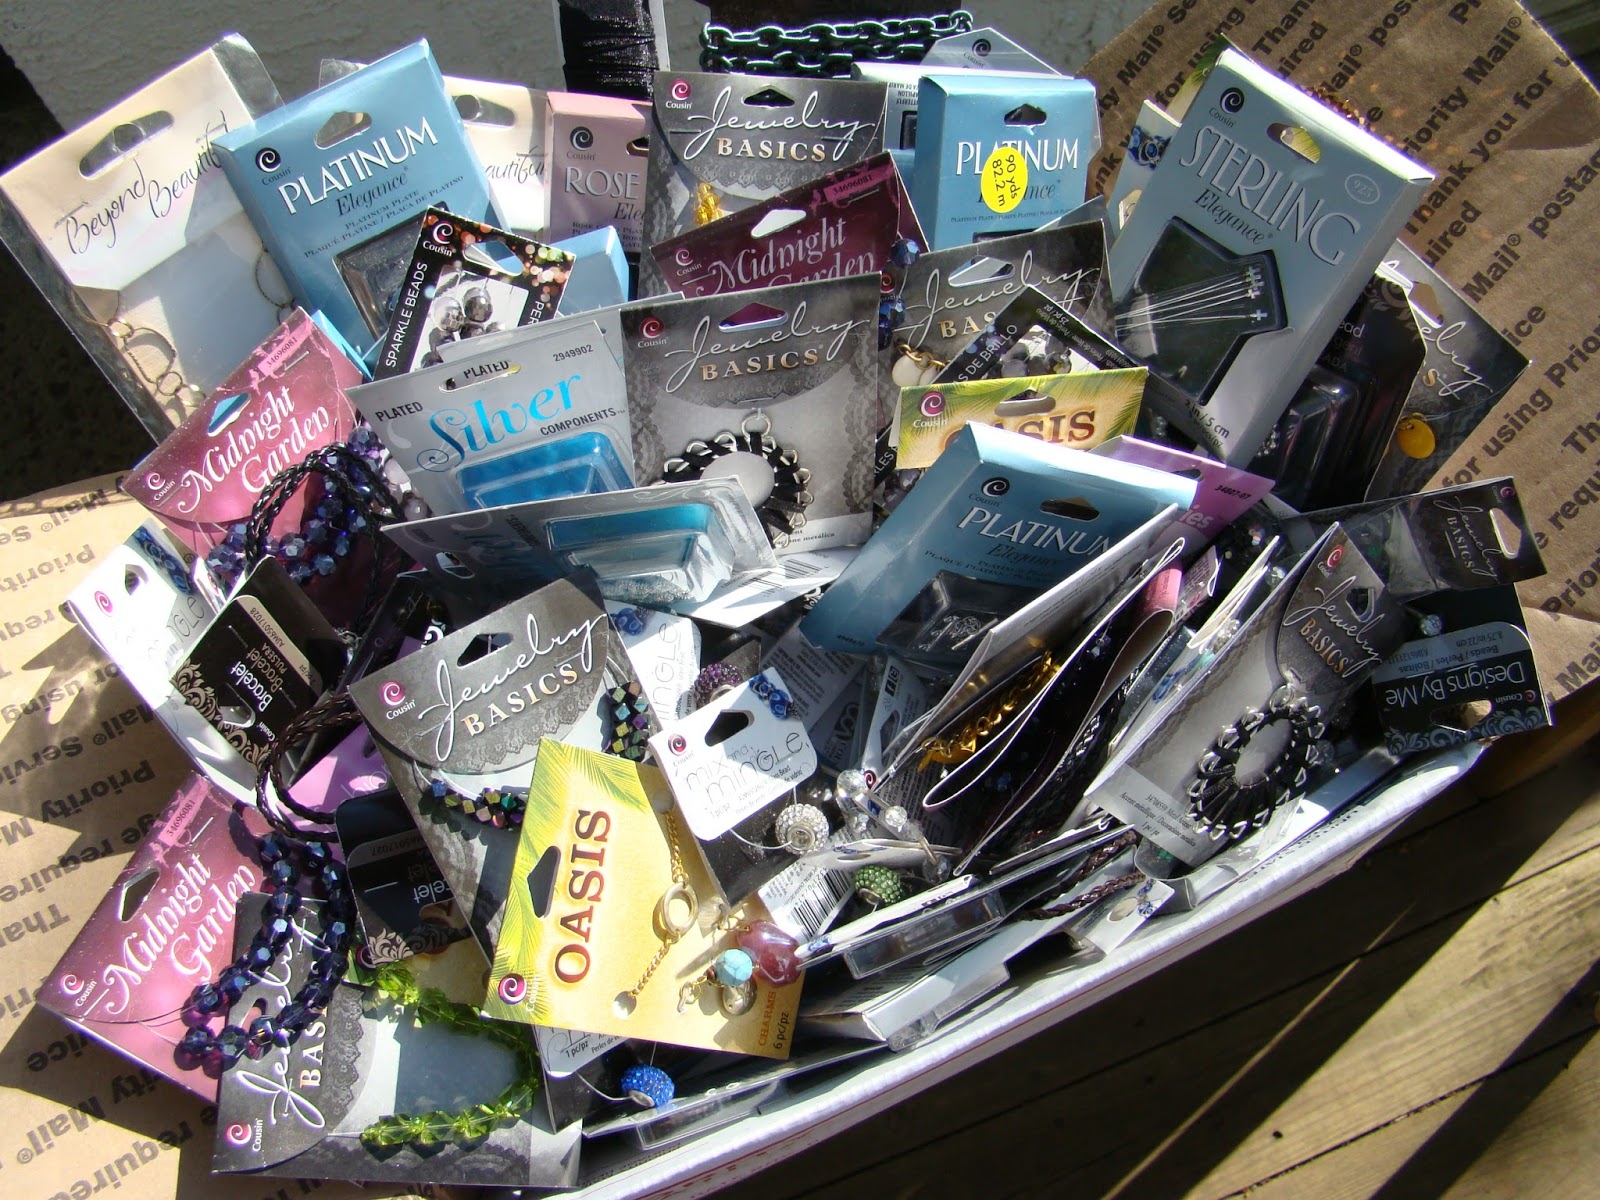
Celebrating a giant box of beads!

Thank you Cousin Corporation! 


Receiving a giant shipping box full of beads this week was so AWESOME! Yay!

On the last day of our Cousin Ambassador Retreat last week, the agenda read, “shopping in the bead warehouse.” 

For ten whole minutes we had a chance to pick anything from a LONG wall of beads in the Cousin Corporation warehouse. 

I love a good reality TV show and this had all the perfect makings! The entire time all I could think was, "wow, I am so lucky!!"

Fortunately, the ambassadors had all week to bond and the fact we were climbing all over each other in the most mannerly way possible was no big deal. J

Today I had a chance to sort through and pick out a few faves. I'd love to hear your thoughts as I go through the box and share.

This is going to take a while!

So, once again, thank you Cousin Corporation!

I’m so happy to be continuing on as an Ambassador this year.

Friday, April 22, 2016

Memory Wire Obsession!


Once again when pressed for time to make jewelry for myself, I turn to memory wire. It's so fun, quick and easy to come up with something new. As I was preparing for my trip back to Clearwater to spend time with the Cousin Corporation and the other five ambassadors, I realized I needed some new jewelry to wear.


I don't usually stick with one strand, but thought it would be fun to use these larger sparkly mirror beads and mix in a bunch of little dangles. It's like a fun jingly little party for your wrist!

All the movement makes it really fun to wear!

I made this one in the hotel room early one morning before our busy day at Cousin Corp using the furry little beads I had found at Walmart. The blue "feather" dangle was the icing on the cake! :)

Funny how using the same kind of wire can produce such different looks! LOVE that memory wire! :)

This weekend I'll share a little more about our whirlwind bead retreat. I had to take a few days to process all of the wonderful things that happened last week.

Well, no more procrastinating, I better get the show on the road! :)

Happy Friday!

Sunday, April 3, 2016

Bracelet made in Clearwater, Florida! - Memories of spring break...

I'm already pining away for the warmth and palm trees we were surrounded by during spring break in Clearwater.

Our goals were to visit with family and then basically relax and have fun! I always bring beads and tools in my checked bag even though it comes close to meeting the weight limit! It's a must!

I can have fun just looking and beads and trying things out, even if I don't actually end up with many completed projects.

Back in February I had found this Cousin Corp. stretchy cord at our local Walmart and decided to use it in a few projects I was making for them.

I was sad that I had to mail them in and hadn't taken the time to make anything for myself. Well, I brought the leftovers and was thrilled when I discovered I had these great peace sign beads that went perfectly!

This stretchy cord is VERY forgiving and easy to use. The ends cut nicely and don't fray. I just knotted the cord around the jump rings on either side of the peace sign and added a few dangles. It just feels like Florida to me.

AND, thanks to Cousin Corp. I'll be taking another trip back to Clearwater next week! More to come on that soon!!

In the meantime, if you're looking for stretchy cord inspiration, here are the other pieces I made for Cousin back in February inspired by my desire for a beachy vacation!

These beachy stretchy knotted bracelets were SO EASY to make! I just cut the cord, knotted the ends and added a dangle.


These bracelets each have a strand of beads sewn right on!


And, here's a simple and fun stretchy necklace:


ENJOY! If you created new jewelry pieces on your recent vacation, please SHARE!

Wednesday, March 9, 2016

Happy Mother's Day necklace, earrings & more!


It’s springy, it’s girly, it’s the new Mother’s Day collection of jewelry making beads and findings! The first word out of my mouth when I received the pieces below was “awww!”
  

I just LOVE the flower pendants. They’re really special and worth seeking out if you have a nearby Walmart. 

In fact, I’m going to be grabbing a few more of these pendants for myself and using them to embellish other things, like a new cell phone case, but that’s a story for another day! :)
After deciding which one to use on a necklace, I wondered what I could do with the FABULOUSLY 3-D white flower pendant.  I went immediately to “craft project!”
  
In fact, once I decided I could make a necklace for this cute journal I found at Walmart for $5.99, I decided it needed one more little touch, so I cut the “Mother’s Day” words off of the Cousin bead package and glued them to the front of the journal. Ha! A simple touch that just felt right. Crafters, you know what I mean, right?! 

So, back to the necklace and earrings. The design for the necklace is a bit of a go-to for me. Using the beads in this way you get a little bit of both worlds. You get interest and dangles in the front and simplified stringing so you can see the beauty of the silky looking pearls in the back!

The earrings just created themselves. The little enamel flowers were just crying out to be dangling from someone’s ears, don’t you think? Very sweet!

In case you’re interested in making these things or just looking for a little bit of inspiration to get started on your own project, instructions are below. To all the moms out there…Happy Mother’s Day!


Materials:
#AJM31112187 –  Pink pearl beads
#AJM31112195 –  Accent flower pendant & flower dangles
#AJM31112213 –  Accent multiple flower pendant
#34774090 – Jewelry Basics 96pc Metal Gold Starter Pack
#3202101 - 40'.45M 7 - Strand Bead Wire Gold

Tools Needed:
·         Round nose plier
·         Flat nose plier
·         Wire cutters

Techniques Used: (Include any stitch or sewing techniques)
·         Make a loop
·         jump rings
·         Crimp


 Instructions

Create four 1-bead 6mm pink pearl headpin dangles
1.     Add one pearl bead to a headpin, bend remaining wire at the top of bead to a 90 degree angle. Leave approx. 3/8” of wire above the bead and cut the rest off.
2.     Use round nose pliers to make a loop.
3.     Repeat 3 more times.

Create four 1-bead 8mm pink pearl headpin dangles
1.     Add one pearl bead to a headpin, bend remaining wire at the top of bead to a 90 degree angle. Leave approx. 3/8” of wire above the bead and cut the rest off.
2.     Use round nose pliers to make a loop.
3.     Repeat 3 more times.

Create six 1-bead 6mm pink pearl eyepin connectors as follows:
1.     Add one pearl bead to an eyepin, bend remaining wire at the top of bead to a 90 degree angle. Leave approx. 3/8” of wire above the bead and cut the rest off.
2.     Use round nose pliers to make a loop.
3.     Repeat 5 more times.

Create four 1-bead 8mm pink pearl eyepin connectors as follows:
1.     Add one pearl bead to an eyepin, bend remaining wire at the top of bead to a 90 degree angle. Leave approx. 3/8” of wire above the bead and cut the rest off.
2.     Use round nose pliers to make a loop.
3.     Repeat 5 more times.

Create two bead wire strands with nine 8mm & ten 6mm pearls
1.     Cut approximately 6” of beading wire.
2.     Slide the end of beading wire through a toggle clasp loop and bend gently at about ½”.
3.     Add a crimp bead and slide it up to cover the short and long ends of wire.
4.     Use crimping tool or smash crimp with flat nose pliers to secure wire.
5.     Add 19 pearl beads in a pattern: 6mm, 8mm, 6mm, 8mm, etc.
6.     Add a crimp bead to end of beading wire.
7.     Slide beading wire through the eyepin loop of a 6mm pearl bead eyepin connector and weave end back through crimp bead.
8.     Pull short end of wire until beads are tight on the wire.
9.     Use crimping tool or smash crimp with flat nose pliers to secure wire.
10.  Trim excess wire using flush cutter.
11.  Repeat bead strand for other side of necklace.

Assemble necklace
1.     Create five-bead connector strand (6mm, 8mm, 6mm, 8mm, 6mm)
2.     Beginning with one side of necklace, connect 6mm pearl bead eyepin connector to an 8mm eyepin connector opening/closing 4mm jump ring.
3.     Repeat by adding remaining 4 eyepin connectors with jump rings.
Repeat on other side of necklace
1.     On the middle jump ring between the two 6mm pearl bead eyepin connectors, add the multi-flower pendant by opening and closing jump ring attached to pendant.

Add dangles
1.     Add a 1-bead eyepin dangle to each jump ring connector. Add 6mm dangle to the jump ring on either side of the flower pendant.
2.     Add 8mm dangles on next jump ring, then 6mm, etc. See project photo.

Earrings
1.     Create one eyepin section for each earring by adding 6mm, 8mm, 6mm pearl beads to eyepin, bend remaining wire at the top of bead to a 90 degree angle. Leave approx. 3/8” of wire above the bead and cut the rest off.
2.     Use round nose pliers to make a loop.
3.     Add ear wire to one eyepin loop.
4.     On the other end, connect tiny flower charm using 6mm jump ring.
5.     Repeat for other earring.

Mother’s Day Journal Materials
·         Journal
·         #AJM31112216 –  gold tone necklace
·         #AJM31112195 –  Accent flower pendant & flower dangles
·         Packing Tape
·         Decorative paper
·         Glue

Tools
Hole punch
Flat nose plier

Instructions
1.     Find an inexpensive journal with a fairly thin “hard-bound” cover.
2.     Use hole punch to make holes for necklace wire.
3.     Remove clasp from each end so the necklace ends fit through hole punch. Slide necklace ends through holes.
4.     Using packing tape, tape down the necklace strands on the inside cover. Cut out a piece of decorative paper and glue over the taped section.
5.     Open jump ring to add large while enamel flower to chain.
6.     Cut “Mother’s Day” words from the bead package and use craft glue or glue stick to adhere it to the journal cover.

ENJOY!